Tuesday, September 10, 2013

Flower Power Parsley Pants


So, that friend with the amazing vintage fabric stash?  She also had this amazing denim.  Yards and yards!  I never actually measured, but it was probably north of twelve yards.  And she could tell by the way my jaw dropped when I saw it that I really wanted to make something from it.


Had to add a cute label.  And I used the same aqua to line the pockets.

Of course, I wanted to make another pair of Parsley Pants!  A pair for Dell and a pair for her daughter.  And it was pretty easy since they're mostly the same size, just do everything twice.  
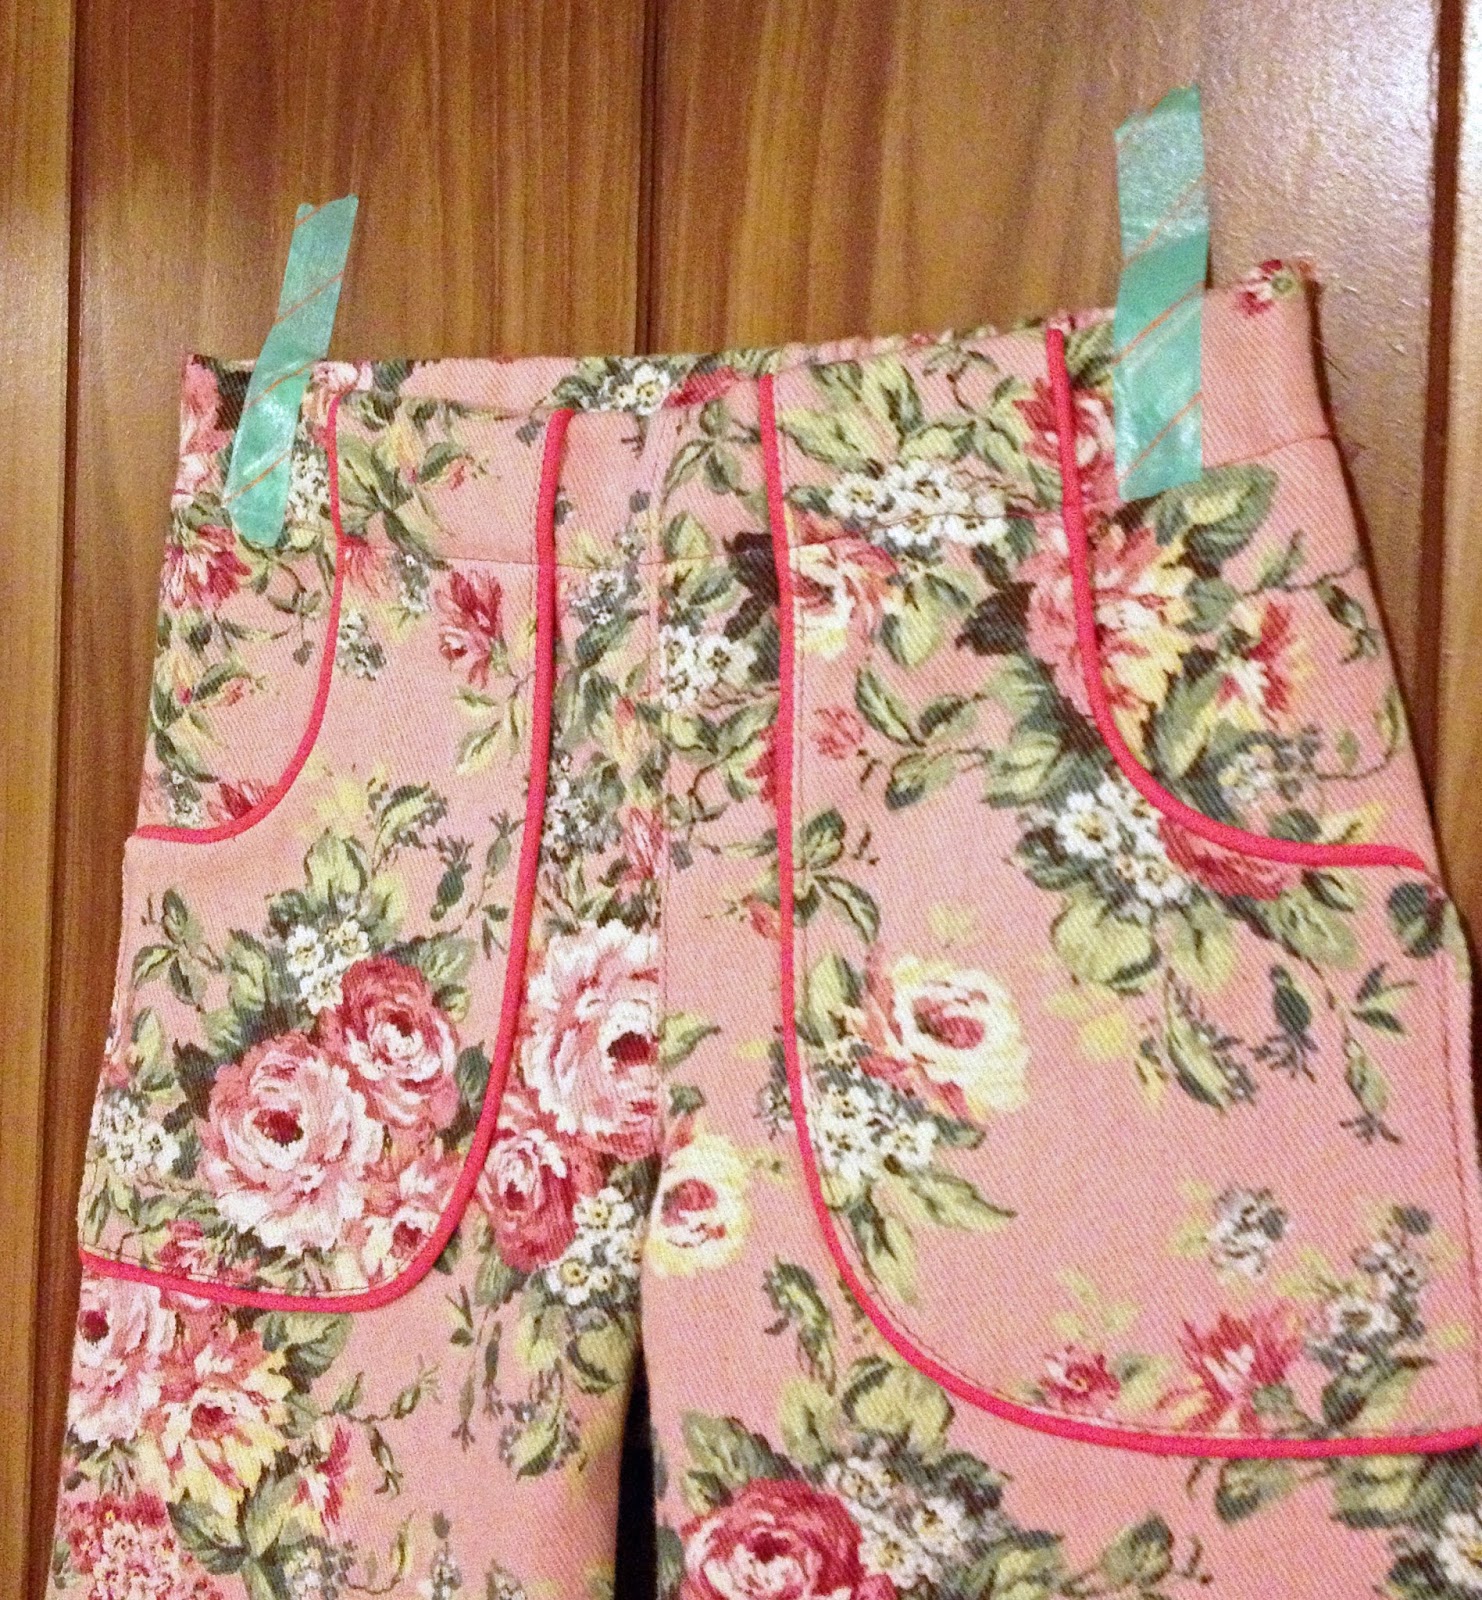


This was my first time trying piping.  I found a couple packages of this pink piping for next to nothing at our guild trip to Marden's, and it turned out to be the perfect color.

I'd read tutorials (there's this one from MADE, and this one from Made by Rae) and new it wasn't hard to do, but I thought it would be more difficult to make it look good.  Not really, all I used was my zipper foot, and pinned a little extra.  And, I did both pairs with one package, leaving me three more packages of piping to make more pants.


And Dell approves.  She's been collecting treasures lately, especially flowers and tiny My Little Ponies, so she needed some real pockets.  I just have to remember to start checking hers when I do the laundry.


So, next up is making everyone I know a pair of Parsley Pants out of the blue denim I managed to sneak out of the stash.  And I have green and dark green piping to trim out the pockets.   I think this pattern is turning out to be one of my favorites.

The look of a girl who has fun pants and has been bribed to pose with globs of peanut butter.   Very satisfied.

Linking up with I Have To Say for Show and Tell Tuesday, and Quilt Story for Fabric Tuesday!


Fresh Poppy Design

Monday, September 9, 2013

Insta-Monday!

So last week was kind of crazy.  The first few days were spent in denial of the upcoming first day of school.  And the last couple were just trying to readjust all our clocks back to school time.


The biggest change is that the dude is staying longer at school, which means no more nap time for him, or his sister unless I can beg someone to carpool with us.  I love naps because that's when I sew, so I had a mini panic attack about never being able to sew ever again, and then husband just suggested I set up a work space on the porch. Duh.


And since we were already on the road, the little girl and I were able to get out and finally go to playgroups that we've just ignored all summer.  We also managed to meet up with a friend that I've been promising a bag to for a while, but hadn't gotten over to her house to sort through her fabric.  She told me she had a lot of hand-me-down fabric, complete understatement.  There was so much vintage awesomeness.


We finally settled on this amazing orange and blue print, probably from the 70s, and a nice lightweight denim for the outer and some Alexander Henry fabric from '95 for the lining.  I can't wait to raid her stash again.


Then I capped off the week with an awesome Seacoast Modern Quilt Guild meeting in Portland, ME at A Gathering of Stitches.  Such a great space, I really hope that I can get up there and use it.  And, as an added bonus, our guild president managed to get us a discount at Marden's and we all went on a fabric spree field trip.  I was trying to be good, so I only got four yards of fabric and a handful of trims.  The whole thing only cost $20!!  The lighter flower fabric is begging to be a dress, and the silverware on blue is going to end up as pj bottoms.

And now, we'll see how this week turns out.  Fingers crossed that we manage to settle into a routine sooner rather than later.

Friday, September 6, 2013

Scrapbuster Quilt Finish!


I'm so glad to finally have this quilt finished.  It's been around so long it practically needs to have chores and an allowance!  I made the top almost two years ago after buying the book Sew to Swap.  I didn't have anyone in mind to swap with, I just really liked the projects inside, and I'd been reading most of the contributors' blogs.


This project was the Scrapbuster quilt (there's a tutorial for the two blocks here and here), which was perfect because, at the time, I thought I had an overabundance of scraps.  Of course, that was when I had a large shoe box of scraps, now I have a 60 quart tub of scraps!


I had this whole thing made, basted, and partially quilted in about a month, but then I started a new project and forgot it existed.  I finally pulled it out over the long weekend and decided to finish it once and for all!  


The quilting design on it was from two years ago, straight lines crossing the points and centers of the corners.  At first I'd been marking the lines all out with a marking pen, but when I restarted, I remembered someone had used blue painters' tape to mark out their lines.  So much better!


Had I not already started the quilting, I might have gone for a more dense free motion pattern and taken advantage of all those frames, but I like how it turned out.  It's drape-y and soft and perfect for cuddling, so I can snuggle and play I Spy with all those scraps.


Linking up with Amanda Jean at for Finish It Up Friday!

Thursday, September 5, 2013

My Rainbow Quilt Got Frankenstein-y

So I've been slowly working on my Rainbow Quilt-As-You-Go quilt and it's definitely been having an effect on my scrap situation.  Unfortunately, my fabric scraps are still plentiful, but my batting scraps have started to come up a bit short. (Sorry, had to.)


It's only $3 on Amazon, but still feels like cheating.

The solution is simple, batting tape, available everywhere and made just for the purpose of piecing together batting.  But I really wanted this to be a quilt that was totally from what I already have, and I don't have batting tape.

So I decided to improvise.  Make my own kind of batting tape!  With fabric, pins, and a machine, all the things that I totally have in my sewing room.  Want to learn my sneaky trick?


I found two pieces of batting that would add up to my 12.5" block, and made sure the sides were mostly flat where I wanted to join them.


Then I sewed my strip of fabric to one side, about a half inch in from the join.  (Of course, habit took over and I sewed right sides together and flipped it over, which is why you only see one line of stitching.  Really don't have to do that, I blame muscle memory!)

The only nail bite-y bit was making sure that there was just enough tension on the batting so that when I sewed the second line, there wouldn't be a gap in the batting.


Then I did my quilting perpendicular to the join, so that each line of stitching is kind of like a bandaid holding those two sides together.


Then I added all the rest of my pieces like normal.  I did have to attach them in rows, so I did a little  stitch in the ditch to get some horizontal quilting on that big pieced chunk in the middle.


You can hardly tell where the join is! (Except for that tiny gap at the top, but I'm betting shrinkage will take  care of that bit.)

I still have about six more blocks to make, but I should be able to do that with my scraps.  And I can try different ways to layout the scraps so that I don't have six blocks that are all rows.

Linking up with Live a Colorful Life for Really Random Thursday!

Wednesday, September 4, 2013

WIP Wednesday


So at last week's WIP update, I had the torso and a sleeve up to the arm, but I decided that the arm was coming out too big.  So I frogged all the way down to the ribbing and started again with smaller needles.  

Luckily, a week in bed sick meant that I had plenty of time to knit, so I'm almost ready to join this sleeve.  Of course, I could have knitted two sweaters by now if I didn't have to keep frogging. 


And I'm pretty keen on finishing up the sweater because I have these pretties waiting for me.  I think the kids need winter hats and mittens.  And I need some soft fuzzy wristlets out of the white alpaca in the middle. 


I almost have this Washi tunic finished. I had plans on trying to add the three-quarter sleeves from Rae's tutorial, but then it got really hot again.  So now it's waiting downstairs for me to make up my mind. 


And my big accomplishment of the week so far is adding some quilts to my Etsy shop.  I'm figuring this is step one on my way to fame, fortune, and rooms full of fabric and glitter, and I'm giving it a big ole checked off!

Linking up with Freshly Pieced for WIP Wednesday!

WIP Wednesday at Freshly Pieced

Tuesday, September 3, 2013

More Fun with Block Swapping!


So far these are the blocks I've received from my Sew Pieceful swap on Flickr. I asked for turquoise, olive, and hot pink/magenta on a white background. I think they came out great.


They're hard colors to have people match, not like orange or red, so I was prepared with an open mind.  Individually, there are off colors, but when you put them all together, it works!  I might add some white sashing in the end to make them look more cohesive.


I signed up for the next round as well, so I'll be adding more blocks to these by the end of the month, but that also means that I need to start figuring out what block to make for my group.  I'm thinking I might try out the Broken Herringbone from Play Crafts, especially since Molli Sparkles has started up a Broken Herringbone Quilt-A-Long.  

Image from Play Crafts
This is the Broken Herringbone, courtesy of Play Crafts


I don't know if I have it in me to make a whole quilt of these blocks, but I can certainly do four blocks to send to my group.  It looks pretty precise, and I tend to get tired quickly of being precise.  I haven't actually read through the tutorial, just the tips and blurbs on Molli Sparkles' blog, but I was too busy giggling to take in any actual information.  I think that's something better left to a quiet day down in the basement sewing dungeon.

Linking up with Better Off Thread for Sew Cute Tuesday and Quilt Story for Fabric Tuesday!

Better Off Thread

Fresh Poppy Design

Monday, September 2, 2013

Happy Labor Day!!!


Happy Labor Day!  I'll be spending my day quilting in the dining room (upstairs! with sunlight!) and eating ice cream.  


If I get this puppy finished, I might have to make that little girl some Parsley Pants if her own.  I have a wild notion that I can use the waistband part of the pattern, but taper the legs to make skinny jeans. Crazy, but it makes sense in my head.